
You may have heard of the term core sample in regard to mining, but obtaining a core sample is another aspect of low slope roofing. To do a core sample on a roof you must do a variety of things. A core sample is a test used by roofers usually to determine the number and material of layers on a roof.
A core cutter is used to dig into the roof until a structural roofing deck is reached, then the commercial roofer performing the core sample will repair the hole left behind. We will go into how to do a core sample on a roof, in this particular case we will explain the process on an EPDM roof – sometimes referred to as a rubber roof.
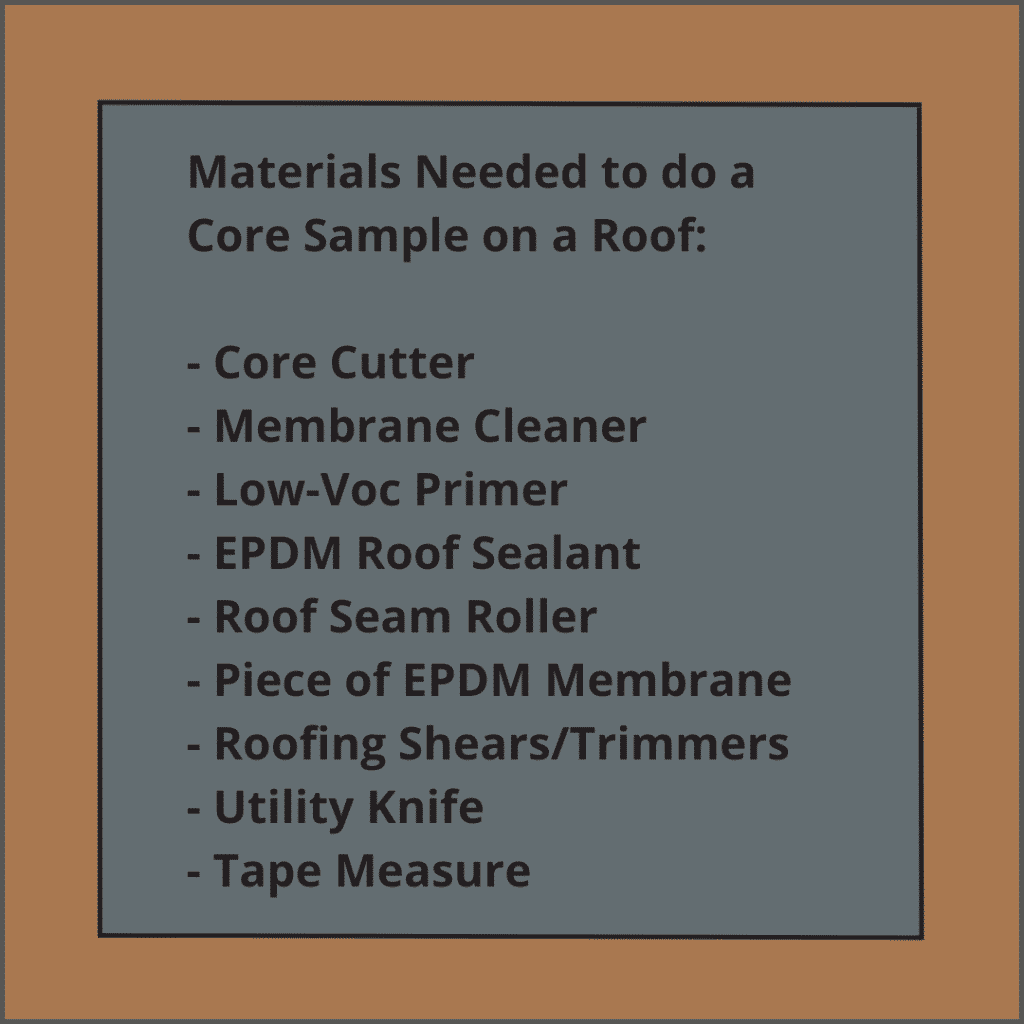
Most of these materials can be found at a local home improvement store. However, some such as the core cutter, may need to be purchased from a specialty roofing supplier


Here are 8 steps to take when doing a core sample on your roof:
Step 1 – To do a Core Sample on a Roof You Must Find an Appropriate Place on the Roof and Clean the Membrane
When looking for the right spot to do a core sample on a roof, it is best to find a high point on the roof. Be sure that you are cutting in the center of a full piece, as opposed to cutting over seams and near roof penetrations. Once you find the right place, pour a good size drizzle of membrane cleaner over the area. After this, use a clean rag to scrub the membrane and clean an approximately 1’ x 1’ area.
Step 2 – Cut the Rubber Membrane
Once you find a clean, safe place, you can use your utility knife to cut out an approximately 2.5” x 2.5” slice of the membrane. It can be windy when you’re up on the roof, be sure to set the membrane aside somewhere where it won’t blow away. We will be placing the membrane over the hole after we’re done and finishing up our process of how to do a core sample on a roof.
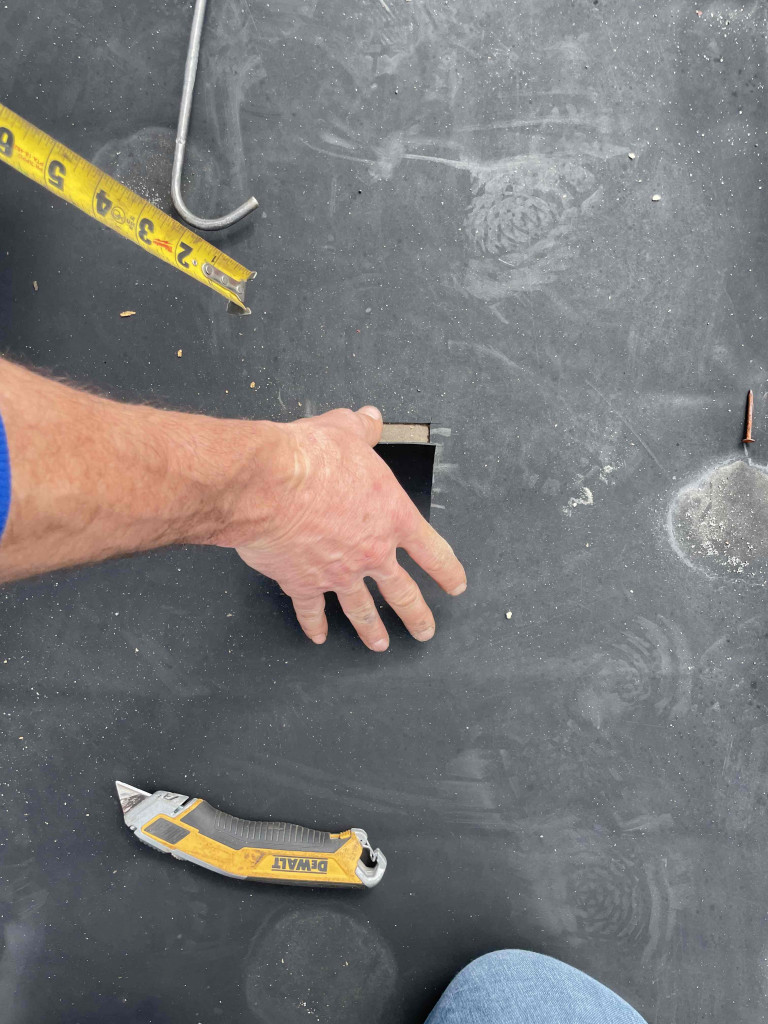
Step 3 – Utilize the Core Cutter and get a Sample
Now, we will use the core cutter tool to dig into the substrate under the roof membrane. Ensure the centerpiece of the core cutter is inside the tool, place the cutter over the substrate. Once in position, kneel over the cutter and begin to twist the core cutter back and forth while pressing down to try and dig through the roofing layers. You will see the inner piece of the core cutter start to move up with each inch of depth you take. Eventually, you should no longer feel any give in the substrate.
Once you feel like there isn’t any more roofing to cut through, bring the roofing core cutter up and pop the roofing materials out of it. Be careful! Like the membrane, the insulation and roofing layers can easily blow away, so store them in your pouch or another safe space. At this point, you may be able to see the roofing deck when looking at the hole. If not, use your utility knife or another appropriate tool to dig away and find the deck.
There is a chance you may need to use the core cutter again when you do a core sample on your roof; If not, you should be able to see your deck at the bottom of the hole you made. Typically, you will find a wood, steel, or concrete deck.
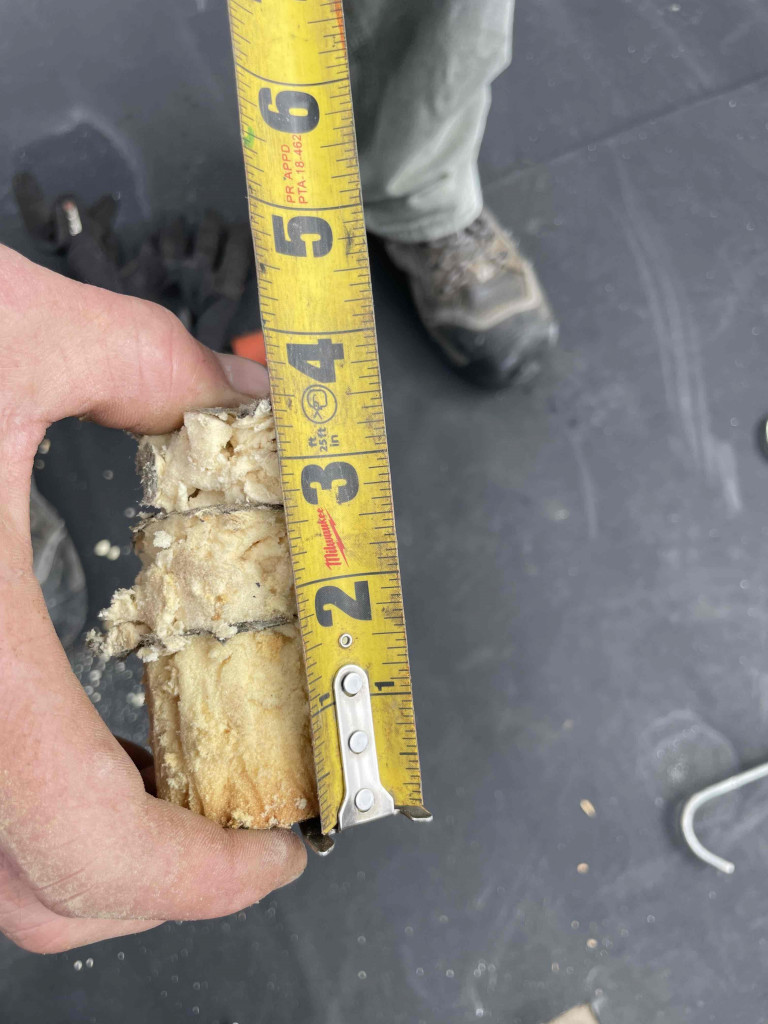
Step 4 – Take Note of Materials and get Pictures
We go through the process, to do a core sample on a roof, for this reason: to find out what is under the roof we are looking to repair or replace! Put the core sample together in your hands, get a picture and use a tape measure to measure the sample and the hole. Take note of each type of roofing layer and the condition of each, along with the insulation. This is important information you need to complete your roof design and estimate costs.
Step 5 – Put the Core Sample Back Together
Now, we have an even more important part of the process than obtaining the sample. Let’s put this roof back together and ensure our client has a water tight area of their rubber roof. First, put the core sample sandwich together as you found it with the piece of membrane on top.
Step 6 – Prime the Membrane
Now that the step to do a core sample on a roof is back together, use your brush to generously apply Low-Voc EPDM Roofing Primer to the area of the core sample and the area you cleaned (approximately 1’ x 1’). If it also a good idea to use your EPDM Roof Sealant and apply some to just the area of the cut (approximately 2” x 2”).

Step 7 – Apply the EPDM Roofing Membrane
Once the primer is tacky to the touch, not too wet, just a bit tacky, you can get ready to apply your EPDM membrane to the area. Cut a piece to fit the primed area, and round off the corners of the membrane.
Then, you will unpeel the sticky side of the membrane and roll it on to the primed area. Be sure to roll it on in a uniform fashion and try to minimize any bubbles. Once stuck, use your Roof Seam Roller and roll the entire area you placed the membrane on. Be sure to generously roll the entire area (even over the actual seams) to help with the adhesion process.
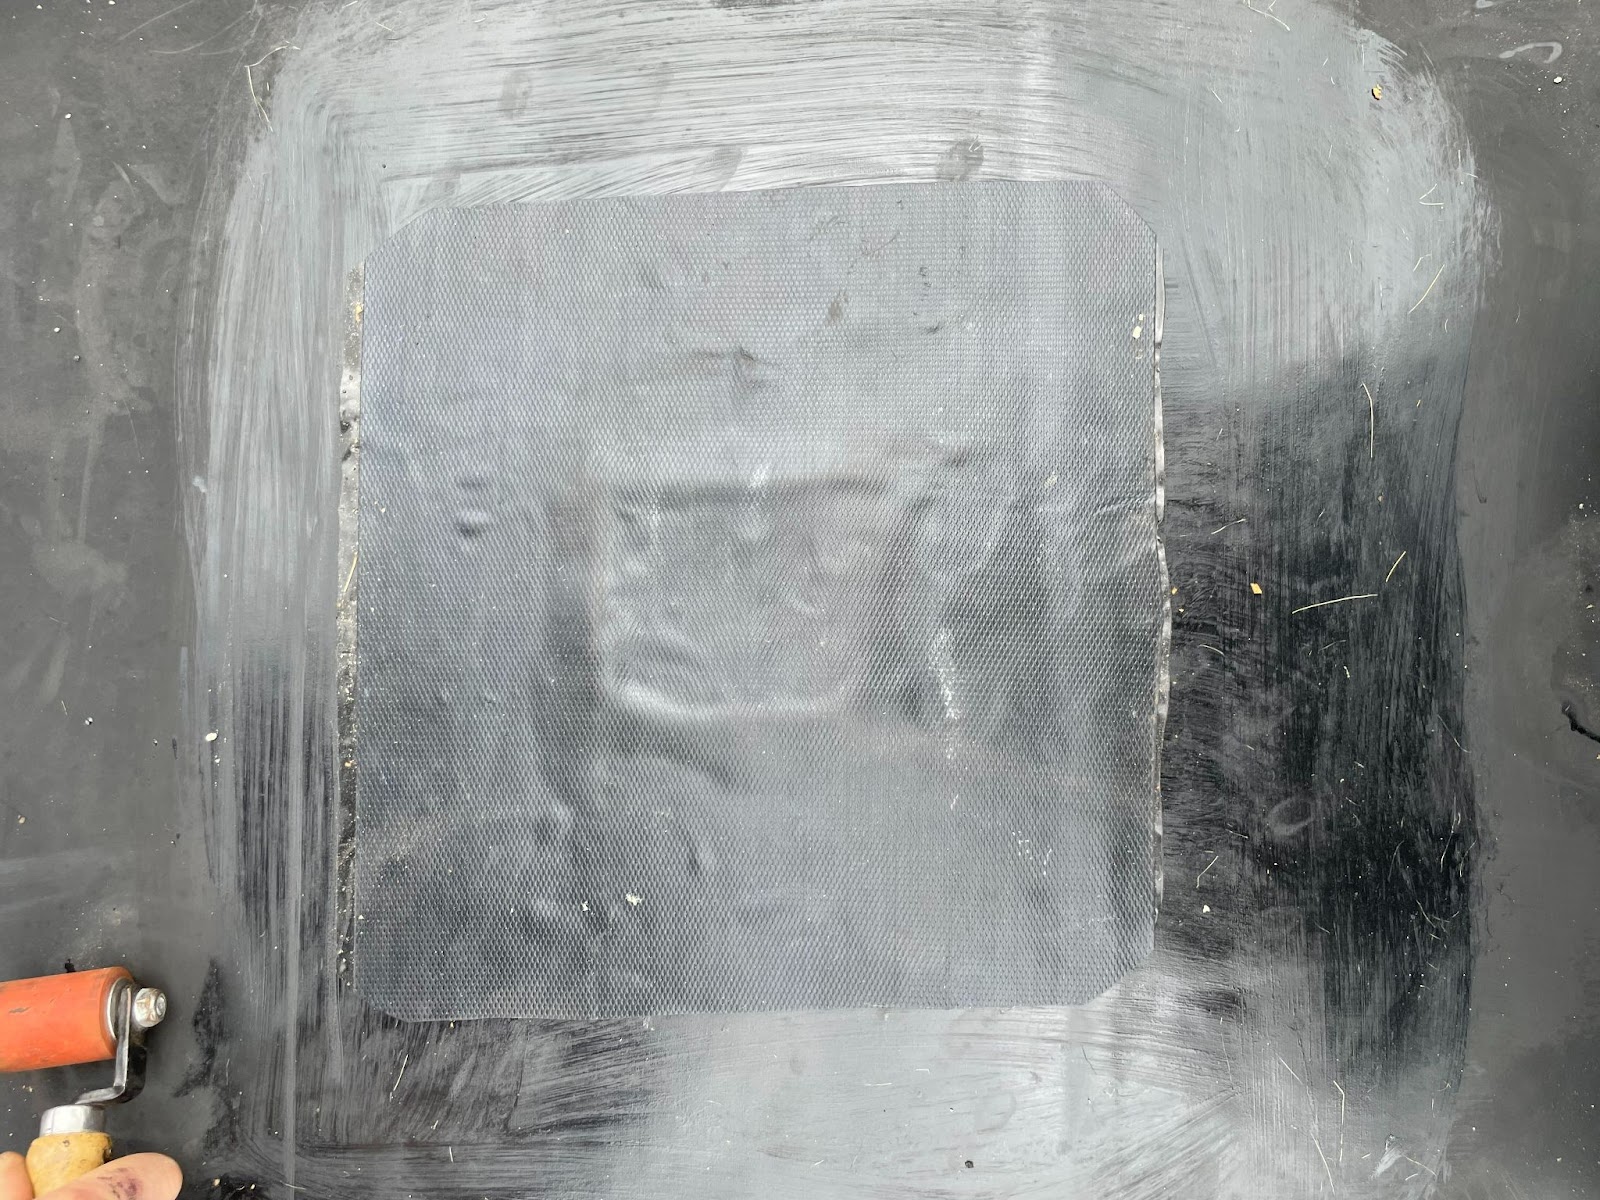
Step 8 – Apply EPDM Roof Sealant to the Perimeter
Almost done with how to do a core sample on a roof! To finish the process, take the EPDM Roof Sealant and Caulking Gun to the membrane. Neatly, apply a bead of sealant around the perimeter of the area of the new membrane. Once the bead is applied, use your finger, or a thin brush, to neatly spread the sealant. After you’re complete, the core sample should look something like the photo below.

Keep in mind, each situation is different when you do a core sample on a roof. This may not be the best way to core sample your particular roof. This is an informational article, not designed to be a technical guide. We recommend using technical data to ensure you are performing the core sample correctly.
SUMMARY

Guaranteed Roofing is a full-scope roofing contractor serving the southern New England area of Connecticut, Massachusetts, and Rhode Island. We are a certified and insured contractor with over 25 years of experience in commercial and residential roofing. For all roofing needs, including how to do a core sample on a roof please reach out to our expert commercial roofing contractors.